Microwaves have come a long way from simply reheating leftovers or popping popcorn. Today’s modern microwaves come packed with smart features — and one of the most impressive among them is sensor cooking technology.
If you’ve ever wondered why your new microwave has buttons labeled “Sensor Reheat” or “Sensor Cook” and what exactly they do, you’re in the right place.
In this guide, we’ll explain what microwave sensor cooking is, how it works, and why it’s worth using. You’ll also learn how to use it properly, what foods work best with it, and what to avoid — so you can take full advantage of this intelligent feature in your kitchen.
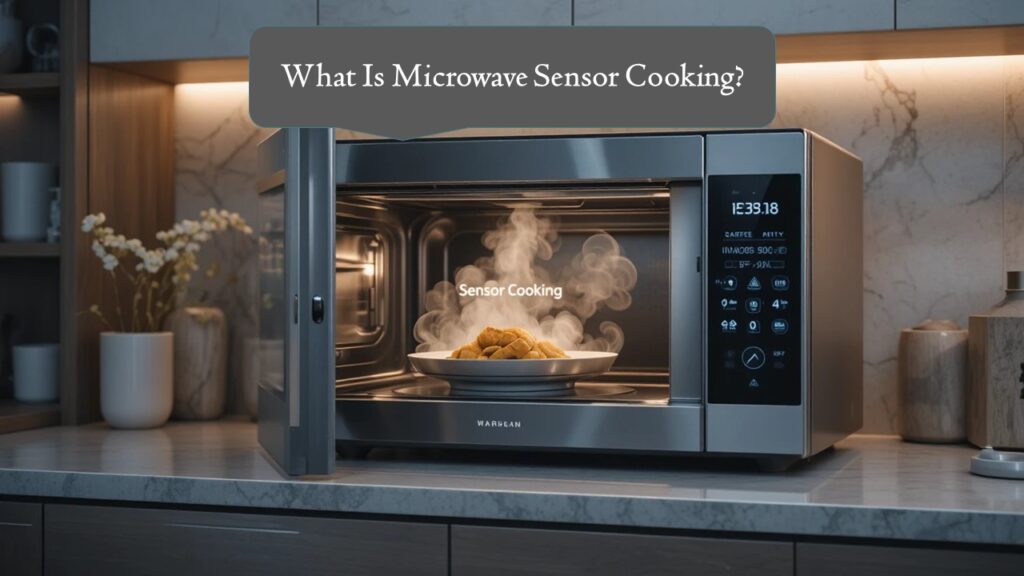
What Is Microwave Sensor Cooking?
Microwave sensor cooking is a smart feature that automatically adjusts cooking time and power levels based on the moisture and humidity released from your food as it cooks.
Instead of relying on guesswork or preset times, the microwave uses built-in steam sensors to determine when food is done — giving you perfectly cooked results with minimal effort.
In simple terms, the microwave senses when your food is ready instead of making you figure it out.
Example:
If you’re reheating a plate of pasta, the sensor detects the steam coming from the food. As soon as it reaches the right humidity level, the microwave automatically stops cooking — no more dry or overcooked leftovers.
How Does Sensor Cooking Work?
Sensor cooking technology relies on an internal humidity sensor that monitors the steam produced inside the microwave cavity. Here’s how it works step by step:
- You select a sensor cook or reheat option on your microwave.
- The microwave begins heating your food at a low power level for the first few minutes.
- As the food warms up, moisture (steam) is released.
- The built-in sensor measures the humidity level inside the microwave.
- Based on this data, the microwave’s computer automatically adjusts the cooking time and power for optimal results.
This process ensures your food cooks evenly without cold centers or dried-out edges — a common problem with manual cooking modes.
Benefits of Using Microwave Sensor Cooking
-
Perfectly Cooked Food Every Time
Sensor cooking takes the guesswork out of microwave use. The automatic adjustments prevent overcooking or undercooking, especially for foods that easily dry out, like rice or vegetables.
-
Saves Time and Effort
You don’t have to set timers or guess the right power level. Just press the sensor cook button, and the microwave handles everything for you.
-
Energy Efficient
Because it optimizes cook times, sensor cooking uses only as much energy as necessary, which can help lower electricity usage over time.
-
Versatile and Convenient
It works with a wide variety of foods — from soups and casseroles to popcorn and leftovers. Most modern microwaves also offer sensor reheat, sensor steam, and sensor defrost options.
-
Better Taste and Texture
Since the microwave stops cooking when your food reaches the ideal temperature and moisture level, you get better flavor, moisture, and texture — without soggy or rubbery results.
Foods That Work Best with Sensor Cooking
Sensor cooking works especially well for foods that release steam or moisture during the heating process.
Here are some examples:
- Reheating leftovers (pasta, rice dishes, casseroles, stews)
- Steaming vegetables (broccoli, carrots, peas, corn)
- Cooking potatoes (baked or mashed)
- Cooking rice and grains
- Reheating soups, sauces, and gravies
- Heating frozen meals
- Cooking popcorn (many microwaves have sensor popcorn buttons)
The key is that the food must produce detectable steam for the sensor to measure.
Foods That Don’t Work Well with Sensor Cooking
While sensor cooking is great for many dishes, it’s not ideal for every type of food.
Avoid using it for:
- Dry foods like bread, crackers, or chips (they don’t produce enough steam)
- Small quantities of food (less than ½ cup)
- Foods wrapped tightly in plastic or covers that trap all the steam
- Eggs with shells or sealed containers (can cause pressure buildup)
If the microwave can’t detect moisture, it won’t know when to stop cooking — leading to uneven results or overheating.
How to Use Microwave Sensor Cooking Properly?
To get the best results, follow these steps when using sensor cooking functions:
-
Start with a Clean Microwave
Any leftover residue or grease inside the microwave can affect how the sensor reads steam levels. Wipe the interior with a damp cloth before use.
-
Use Microwave-Safe Containers
Always use open or vented microwave-safe containers. Avoid tightly sealing the dish — the steam needs to escape for the sensor to detect it.
-
Don’t Cover Tightly
If you cover your food, use a microwave-safe lid or plastic wrap with a vent. The goal is to trap enough heat to cook efficiently but still allow steam to reach the sensor.
-
Don’t Interrupt the Cooking Cycle
Once sensor cooking begins, let it complete the cycle. Opening the door mid-process releases steam, confusing the sensor and possibly affecting results.
-
Follow Manufacturer Instructions
Different brands (like Panasonic, LG, Samsung, and Whirlpool) have slight variations in how their sensor technology works. Refer to your model’s manual for the best performance tips.
Types of Sensor Functions in Modern Microwaves
Many new microwaves come with multiple sensor modes, depending on what you’re cooking. Here are the most common:
-
Sensor Cook
Automatically determines the correct cooking time for fresh or frozen foods.
-
Sensor Reheat
Detects moisture levels to reheat leftovers without overcooking.
-
Sensor Steam
Designed for vegetables and seafood — maintains a delicate balance between moisture and temperature.
-
Sensor Defrost
Adjusts power levels and time for thawing meat or frozen meals safely.
-
Sensor Popcorn
Monitors popping sounds and humidity to stop at the perfect moment — no more burnt popcorn!
Advantages Over Traditional Microwaves
| Feature | Traditional Microwave | Sensor Microwave |
| Cooking Control | Manual | Automatic |
| Temperature Monitoring | None | Uses humidity sensor |
| Risk of Overcooking | High | Very low |
| Convenience | Basic | Smart and adaptive |
| Energy Efficiency | Moderate | Higher (saves energy by optimizing cook time) |
Sensor cooking essentially turns your microwave into a smart appliance that adapts to your food — not the other way around.
Common Problems and Troubleshooting Tips
Even with advanced technology, sensor cooking isn’t perfect. Here are some issues you might face and how to fix them:
- Problem: Food undercooked.
Solution: Add a bit of water or moisture before reheating; the sensor needs steam to function. - Problem: Microwave stops too early.
Solution: Food portion might be too small — sensor couldn’t detect enough humidity. - Problem: Uneven heating.
Solution: Stir or rearrange food halfway through; large portions can have cool spots. - Problem: Steam buildup.
Solution: Use vented covers to allow steam to escape properly.
How to Clean and Maintain the Sensor?
The sensor is usually located on the top interior wall of the microwave. Keep it clean and grease-free, as buildup can interfere with readings.
Use a soft damp cloth — avoid harsh chemicals or abrasive pads. Cleaning regularly ensures accurate cooking performance over time.
Is a Sensor Microwave Worth It?
Absolutely — especially if you cook or reheat food frequently.
Here’s why it’s a smart investment:
- You save time and effort.
- It eliminates guesswork.
- Results are consistent and tasty.
- It’s energy efficient.
While sensor microwaves may cost slightly more than basic models, the convenience and precision make them worth every penny for modern kitchens.
Conclusion:
Microwave sensor cooking is a game-changer for anyone who values convenience, consistency, and great-tasting food. By automatically adjusting cooking times based on real-time steam readings, this technology ensures your meals are never undercooked or overdone again.
Whether you’re reheating last night’s leftovers, cooking rice, or steaming vegetables, sensor cooking does the thinking for you — so you can simply press a button and enjoy perfectly prepared food every time.
If your microwave has this feature, don’t ignore it — embrace it. Once you experience the precision of sensor cooking, you’ll never want to go back to manual settings again.